
Building Your First ASP.NET Core Razor Pages Application: A Step-by-Step Guide 🚀
🛠️ Project Setup
Let's begin by setting up our ASP.NET Core project in Visual Studio.
Open Visual Studio and select "Create a new project."
Choose the "ASP.NET Core Empty" template and click "Next."
Configure your new project:
- Project name: RPExercises
- Solution name: RPExercises
- .NET Core version: Select .NET 5.0 (or your preferred compatible version).
Click "Create" to generate your project.
📂 Defining Your Data Model
Next, we'll create the Student model, which represents the structure of our student data.
In your project's root directory, create a new folder named Models.
Inside the Models folder, add a new class named Student.cs.
Populate Student.cs with the following code:
namespace RPExercises.Models
{
    public class Student
    {
        public int Id { get; set; }
        public string Name { get; set; }
        public string Sex { get; set; }
        public int? Marks { get; set; }
    }
}
📦 Installing Essential NuGet Packages
Entity Framework Core is crucial for database interaction. We'll install the necessary NuGet packages. Open the Package Manager Console in Visual Studio (Tools > NuGet Package Manager > Package Manager Console) and run these commands:
Install-Package Microsoft.EntityFrameworkCore -Version 5.0
Install-Package Microsoft.EntityFrameworkCore.Tools -Version 5.0
Install-Package Microsoft.EntityFrameworkCore.Design -Version 5.0
Install-Package Microsoft.EntityFrameworkCore.SqlServer -Version 5.0
🗄️ Setting Up Your Database Context
The AppDbContext class acts as a bridge between your application and the database.
Create a new folder named Data in your project's root.
Inside the Data folder, add a new class named AppDbContext.cs.
Add the following code to AppDbContext.cs:
using Microsoft.EntityFrameworkCore;
using RPExercises.Models;

namespace RPExercises.Data
{
    public class AppDbContext : DbContext
    {
        public AppDbContext(DbContextOptions<AppDbContext> options) : base(options) { }
        public DbSet<Student> tblStudents { get; set; }
    }
}
⚙️ Configuring the Connection String
We need to tell our application how to connect to the database. This is done in the appsettings.json file.
Open appsettings.json and add the ConnectionStrings section as shown below. Remember to replace the DBCS connection string with your actual database connection details.
{
    "Logging": {
        "LogLevel": {
            "Default": "Information",
            "Microsoft": "Warning",
            "Microsoft.Hosting.Lifetime": "Information"
        }
    },
    "ConnectionStrings": {
        "DBCS": "Data Source=(localdb)\\MSSQLLocalDB;Initial Catalog=Appliedk9;Integrated Security=True;Connect Timeout=30;Encrypt=False;Trust Server Certificate=False;Application Intent=ReadWrite;Multi Subnet Failover=False"
    },
    "AllowedHosts": "*"
}
🚀 Updating the Startup Class
The Startup.cs file is where we configure our application's services and HTTP request pipeline.
Open Startup.cs and modify it as follows to register Razor Pages and our AppDbContext:
using Microsoft.AspNetCore.Builder;
using Microsoft.AspNetCore.Hosting;
using Microsoft.EntityFrameworkCore;
using Microsoft.Extensions.Configuration;
using Microsoft.Extensions.DependencyInjection;
using Microsoft.Extensions.Hosting;
using RPExercises.Data;

namespace RPExercises
{
    public class Startup
    {
        private readonly IConfiguration _cfg;
        public Startup(IConfiguration configuration) { _cfg = configuration; }

        public void ConfigureServices(IServiceCollection services)
        {
            services.AddRazorPages();
            services.AddDbContext<AppDbContext>(options =>
            {
                options.UseSqlServer(_cfg.GetConnectionString("DBCS"));
            });
        }

        public void Configure(IApplicationBuilder app, IWebHostEnvironment env)
        {
            if (env.IsDevelopment()) { app.UseDeveloperExceptionPage(); }
            app.UseRouting();
            app.UseEndpoints(endpoints => { endpoints.MapRazorPages(); });
        }
    }
}
📊 Database Migrations
Now, let's create our database based on the Student model using Entity Framework Core migrations. Open the Package Manager Console again and execute these commands:
Add-Migration Initial
Update-Database
These commands will create a migration file and then apply it to your database, creating the tblStudents table.
📄 Creating Razor Pages
Razor Pages are self-contained units of UI logic and views. We'll create an Index page to display our student list and a Create page to add new students.
In your project's root, create a new folder named Pages.
Add a new Razor Page to the Pages folder and name it Index. This will generate Index.cshtml and Index.cshtml.cs.
Add another new Razor Page to the Pages folder and name it Create. This will generate Create.cshtml and Create.cshtml.cs.
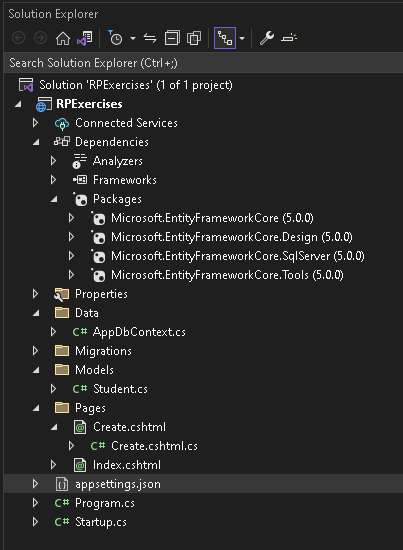
Your project structure should now look similar to this:
Displaying Students: Index.cshtml.cs and Index.cshtml
The IndexModel will fetch the list of students from the database, and Index.cshtml will display them in a table.
using Microsoft.AspNetCore.Mvc;
using Microsoft.AspNetCore.Mvc.RazorPages;
using Microsoft.EntityFrameworkCore;
using RPExercises.Data;
using RPExercises.Models;
using System.Collections.Generic;
using System.Threading.Tasks;

namespace RPExercises.Pages
{
    public class IndexModel : PageModel
    {
        public List<Student> Students { get; set; } = new List<Student>();
        private readonly AppDbContext _ctx;

        public IndexModel(AppDbContext ctx) { _ctx = ctx; }

        public async Task<IActionResult> OnGetAsync()
        {
            Students = await _ctx.tblStudents.ToListAsync();
            return Page();
        }
    }
}
Index.cshtml
@page
@model RPExercises.Pages.IndexModel
@addTagHelper *, Microsoft.AspNetCore.Mvc.TagHelpers

<h2>List Students</h2>
<br/>
<form method="get">
    <table border="1" cellpadding="4">
        <thead>
            <tr>
                <th>Id</th>
                <th>Name</th>
                <th>Sex</th>
                <th>Marks</th>
                <th>Edit</th>
            </tr>
        </thead>
        <tbody>
            @foreach (var
student in Model.Students)
            {
                <tr>
                    <td>@student.Id</td>
                    <td>@student.Name</td>
                    <td>@student.Sex</td>
                    <td>@student.Marks</td>
                    <td><a asp-page="Edit" asp-route-id="@student.Id">Edit</a></td>
                </tr>
            }
        </tbody>
    </table>
</form>
<h3><a asp-page="Create">Create New Student</a></h3>
Creating New Students: Create.cshtml.cs and Create.cshtml
The CreateModel will handle submitting new student data, and Create.cshtml will provide the input form.
using Microsoft.AspNetCore.Mvc;
using Microsoft.AspNetCore.Mvc.RazorPages;
using RPExercises.Data;
using RPExercises.Models;
using System.Threading.Tasks;

namespace RPExercises.Pages
{
    public class CreateModel : PageModel
    {
        private readonly AppDbContext _ctx;

        public CreateModel(AppDbContext ctx) { _ctx = ctx; }

        [BindProperty]
        public Student Student { get; set; }

        public IActionResult OnGet() { return Page(); }

        public async Task<IActionResult> OnPostAsync()
        {
            if (!ModelState.IsValid) { return Page(); }
            await _ctx.tblStudents.AddAsync(Student);
            await _ctx.SaveChangesAsync();
            return RedirectToPage("./Index");
        }
    }
}
Create.cshtml
@page
@model RPExercises.Pages.CreateModel
@addTagHelper *, Microsoft.AspNetCore.Mvc.TagHelpers

<h1>Create New Student</h1>
<form method="post">
    <table border="1" cellpadding="4">
        <tr hidden>
            <td><label asp-for="Student.Id"></label></td>
            <td><input asp-for="Student.Id" /></td>
        </tr>
        <tr>
            <td><label asp-for="Student.Name"></label></td>
            <td><input asp-for="Student.Name" /></td>
        </tr>
        <tr>
            <td><label asp-for="Student.Sex"></label></td>
            <td><input asp-for="Student.Sex" /></td>
        </tr>
        <tr>
            <td><label asp-for="Student.Marks"></label></td>
            <td><input asp-for="Student.Marks" /></td>
        </tr>
        <tr>
            <td colspan="2" style="text-align:right;"><input type="submit" value="Create" /></td>
        </tr>
    </table>
</form>
<div>
    <a asp-page="./Index">Back to List</a>
</div>
▶️ Running Your Application
With everything set up, run your application (usually by pressing F5 or clicking the "IIS Express" button in Visual Studio).Initially, you'll see an empty table on the Index page. Click the "Create New Student" link to navigate to the creation form. Fill in the student details and click "Create." You'll then be redirected back to the Index page, where your newly added student will appear!
SNAPSHOTS


No comments:
Post a Comment